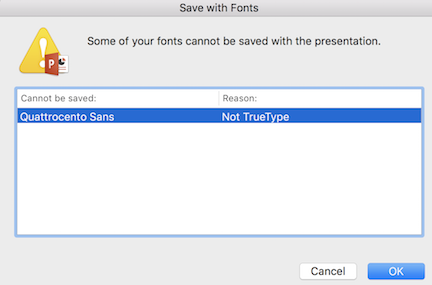
Don’t know how to keep PowerPoint fonts from changing? Here is a post about how to embed fonts in PowerPoint and fix the “some of your fonts cannot be saved with the presentation” problem!
Are you facing a situation like this: You designed a magnificent PowerPoint using a font you found on the internet.

But you discovered a great problem only after you received feedback from your classmates or colleagues — the font couldn’t show properly on their computers!

The problem is often due to a common reason: they don’t have that font installed in their computer. However, there are simpler ways to solve this problem other than asking them to install a new font.
Here is the post for you — we are here to introduce three methods of maintaining font shapes in PowerPoint, with comparisons and ratings.
Enjoy!
1. Changing Settings in PowerPoint
Efficiency ★★★★☆
Difficulty ★☆☆☆☆
- Open the menu by clicking “File”
- Click “Options” to show the above screenshot
- Click “Save” in the option menu
- Make sure the “Embed fonts in the file” setting is ticked
- Press “ok”
However, this method doesn’t always work as some fonts are not supported to be embedded in PowerPoint. In these situations, try to use other recommended methods to fix the missing font error!

2. Changing Text into Image
Efficiency ★☆☆☆☆
Difficulty ★☆☆☆☆
It is a stupid but fast method for light workload only.
- Select the text and cut them out by Ctrl-X
- Paste them as pictures
Please be noted that
- Small-sized words in the PowerPoint may become unclear when enlarged
- Text editing is not available
- Each “cut and paste” action are done individually
3. Changing Text into Shape
Efficiency ★★☆☆☆
Difficulty ★★★★☆
Saving text in the form of shape can not only maintain your font in the PowerPoint, but also allow further adjustments in refining shape appearance.
- Click “Insert”, “Shape” then “Rectangle” to insert a rectangle that is large enough to cover the text.
2. Use the rectangle to cover the text.
3. Select the rectangle and right-click, choose “Send to back” to obtain the effect below.
4. Select both the text and the rectangle by holding the “Ctrl” or “Shift” key.
5. Click “Shape Format”, “Merge Shape” then “Intersect”.
6. At this time, the text is already converted into shape. Click “Edit Shape” then “Edit Point” to further refine the shape.

And you can achieve cool result like this:


After editing text as shape, you can fill it with new colors and add effects to suit your presentation topic.
You do not need Photoshope or Illustrator to do this — just PowerPoint is enough!
4. Conclusion
In this article, you should learn how to embed font in PowerPoint and edit text as shape. But if you fail to succeed by these approaches, remember to choose “read-only” instead of “edit anyway” when opening the PowerPoint on a new computer!


